Wednesday, November 3, 2010

Happy World Vegan Day!

I know, I know, I'm a few days late... But that doesn't mean I can't celebrate World Vegan Day everyday!

 World Vegan Day was officially on Monday, November 1st. John is at school until 4 on Monday, so that doesn't make it the best day for making exciting dinners. Instead we went to our favourite restaurant in Victoria, the Reef. The Reef is a Caribbean restaurant just downtown that is absolutely delicious. We shared chana salad, yam fries with mango chutney, and ital trini roti. Miam miam!*

On Tuesday, I had a bit more time for dinner prep and a leftover Jack'o'Lantern...

Smile while you still can, Mr. Pumpkin.
I was in a surprisingly ambitious mindset, so I decided to make homemade ravioli with pumpkin-cashew filling, and an alfredo style sauce!

Ingredients (filling)

-1 C. roasted pumpkin
-2 Tbsp. olive oil
-1/4 tsp nutmeg
-1/4 tsp. cinnamon
-1/4 tsp. cumin
-1/4 C. ground cashews
-salt and pepper to taste

1. Heat olive oil over medium heat in a large sauce pan. Add spices and ground cashews.
2. Stir in pumpkin, and cook until it's all mixed together and delicious smelling.
3. Set aside!
4. You should probably start boiling your water for your pasta. Big pot, bit of salt, bit of olive oil!


Here's the recipe for the pasta!

-1 1/3 C. all purpose flour
-2/3 C. amaranth flour
-1/2 tsp salt
-2 tsp. dried basil
-1/2 C. water
-1 tsp. olive oil

1. Sift together the dry ingredients, then add the oil and water and knead until you get a stiff dough.
2. Turn dough out onto a lightly floured surface, and roll it out as thin as you can with a rolling pin! I did mine in sections, which was a lot easier.
3. Cut your dough into squares/rectangles, each approximately the same size.
4. Put about 1 Tbsp pumpkin filling in the center of a square, place another square on top, and then pinch together until sealed.
5. Drop into your pot of already boiling, lightly salted water and cook for about 15 minutes. Stir once or twice to make sure they don't stick to the bottom!

For the sauce, I made a soy-free alfredo, using this recipe
-1/2 C. cashews
-1 tsp. lemon juice
-1 to 1 1/2 C. boiling water
-2 cloves garlic (you might want to saute these in a bit of olive oil first to bring out the flavour)
-1 Tbsp. olive oil
-2 Tbsp. nutritional yeast
-salt and pepper to taste

It's super easy! Just process the cashews in a food processor first, then transfer them to a blender
2. Add in 1/2 the water, blend until creamy. Add in the rest of the water, blend again.
3. Add the rest of the ingredients and blend until really smooth.
4. Put on pasta!

Phew! That's a lot of typing. It was worth it though, very delicious. Although rolling out the pasta with a rolling pin is not much fun - I put a pasta maker on my Christmas list!

Rowan plans this pumpkin's demise.


*I recently learned that this is how the French say "Yum yum", and I am trying to be more European.

Wednesday, September 22, 2010

Promise to my son

So, it was Rowan's birthday last week.


It must suck to be a vegan kid sometimes. Obviously, Rowan is still too young to feel peer pressure, but I don't look forward to the day when some kid realizes that Rowan doesn't have a bologna sandwich in his lunch box.

So, I made a promise to Rowan - his lunches will not only vegan, and healthy, but also fun, and will cause all the other school children to want to be him.

But I'm getting ahead of myself here. Rowan just turned one, and won't be going to school anytime soon. So here is the addendum to my promise...


Rowan will always get delicious vegan cupcakes on his birthday!


I think he likes this idea.


The recipe I used is the chocolate and vanilla marble cupcakes from Vegan Cupcakes Take Over the World (my bible.) I wasn't sure it was going to work out, the chocolate batter seemed much runnier than the vanilla and I didn't know if they would cook evenly, but they did!

One tip is to swirl it a LOT more than you think you should. I swirled them together, and they looked pretty good from the top...


But once you opened up the wrapper, the effect was kind of lost..

                            
                                 Not very swirly.         


For icing, I just used my chocolate pudding recipe, and stuck it in the fridge til I was ready for it.

Rowan loved it! Yay!

Warning: Terrible singing ahead.  I know I'm tone deaf. Poor John.


Happy birthday, dear Rowan! Happy birthday to you!

Tuesday, September 21, 2010

Chocolate peanut butter banana pie!

Last week, we had our first dinner guests over. That really made it feel like "home" here. Not to mention, we had kind of gotten into a rut of the same stir-fries, curries, and sandwiches over and over again. Nothing like guests to inspire you to try something new!   (Not to mention it also encourages us to clean the house, something we really ought to do more often.)

Our meal was Ethiopian inspired. We made an eggplant stew, a lentil dish, and a sweet potato stew. Talk about ambitious! Combine that with the injera we picked up at a nearby restaurant, it ended up being way too much food! The sweet potato stew didn't even make it to the table, I just froze it to save for later!

So, keeping that in mind, I wasn't too upset when I was the only one to finish my dessert...


I need to stop eating food before I take a picture of it...
It's Chocolate-Peanut-Butter-Banana Pie!

And it was super easy to make.

Ingredients:
1 pre-made pie crust
2 medium avocados
1 c. peanut butter
1 c. cocoa powder
3/4 c. sugar
2 Tbsp. vegan milk (I used almond)
2 tsp. vanilla
2 bananas
2 oz. dark chocolate
2 tsp coconut oil

Cook pie crust according to manufacturers instructions.  You could always make your own, but I've had issues doing that in the past... it's hard to get a perfect vegan pie crust if you can't use soy! The WF brand pie crusts are vegan (at least the ones at my store are!), and they're actually really delicious. I've used them several times since discovering this...Anyway, cook, and then set aside!

Put everything in a food processor except 1 1/2 bananas, the dark chocolate, and the pie crust (duh). Give it a good processing! It should be thick, and there should be no chunks of avocado or banana left.

Scoop filling into the pie crust. Cut the remaining 1 1/2 bananas into slices and layer on top of the filling. Melt the dark chocolate in a small pot with the coconut oil, and drizzle over the pie.

Freeze for about 2 hours, or until you're ready to eat!

It made a really rich dessert. I originally planned on just a peanut butter and banana pie, but because of the avocado, the filling was green. And it weirded me out.

I guess I'm just not that kind of vegan.

Saturday, August 7, 2010

Taco pizza, pudding, and Octodon!

Yesterday was such a delicious day.

For starters, we made a delicious "taco" pizza.

                                                           So close, you could almost smell it...
It was pretty easy to assemble. We used pre-made crusts, but you could easily make your own! 

Ingredients
2 pre-made pizza crusts
2. C salsa
1 large red bell pepper, chopped
1 large yellow bell pepper, chopped
1 12 oz can of corn (or you could use fresh!)
1/2 can of black beans 
1 onion, chopped
2-3 cloves garlic, minced
2 avocado, cubed
vegan-rella 

Do I need to tell you how to assemble this? Really? Well, fine.

Preheat oven to 425! 
Caramelize onion and garlic in pan. Put salsa on crusts. Put everything except for avocado on crusts. Place crust directly on the rack, and bake for about 12 minutes (or crust maker's instructions). Remove from oven, top with avocado! EAT! You're so thin!

If you feel the beans don't add enough protein for you, you could always add some veggie ground round, or some actual ground beef (shame on you!). But I think there was definitely enough on the pizzas as it was. We all needed forks to gather lost pizza toppings off our plates!

While we were eating lunch, some hooligan came and vandalized our car!

Octodon!
                                                                      

Okay, not really. 

See, we've had this old Corolla sitting around in our parking spot for ages. No one would take it (not even the Kidney foundation!). John didn't want to get it towed since it had our brand new winter tires on it. So finally we got some old tires to put on it, then switched them... and then called our friend Adrian to come paint it! 

It was really sweet. He let me try out some paint on the back of it, but mostly I was content to just sit back and watch the master work! 

The beginning!
It's beginning to take shape.
Octodon! 
Close up of Octodon!
Rowan and I watching.    

  After a hard day watching Adrian paint in the sun, we came back in for some dessert!

I did take some pictures, but they aren't that nice looking... Hm. Anyway! This is a recipe I've made several times, changing it up a bit each time. This time, I realized I didn't have coconut oil after I had started. I think it turned out okay without it!

2 avocado, small (or 1 large!)
1 large banana
1/4 cup unsweetened cocoa
1/4 cup agave nectar
1/2 tsp vanilla

Blend it all together in a food processor!

Didn't you already have pudding today? 


Looks pretty tasty, hm? But kind of sad and lonely there in the dish all by itself...

I mixed it with my friend Allysia's 2 Minute Vegan Icecream recipe, which you can find here!
http://super-vegan.blogspot.com/2010/04/speedy-vanilla-pecan-chip-ice-cream.html
although I left out the cacao nibs, pecans, and jam!

Rowan really loves this treat, and I'm glad!

A fine chocolate mustachio!

Saturday, July 24, 2010

Moussaka & Cheesecake! Yum!

Notes on the process
This was definitely one of our most successful first tries.  Neither of us had make moussaka before, and we weren't entirely sure how it would turn out.  Fortunately, it was awesome.  As noted in the ingredients, we used crushed tomatoes, and we also pureed some of the vegetables, which made the finished product come out at about the consistency of a very thick stew.  If you wanted it to turn out more like a lasagna type of thing, you could leave the veggies in pieces.

This is definitely slow food, so unless you're a multi-tasking kitchen alchemist, it's probably best to give yourself at least 1.5 hours of prep time.  We were also making cheesecake simultaneously, which required some of the same equipment.  It was a fun afternoon in the kitchen!  Here's what we did:


MOUSSAKA!

Ingredients

1 cup cooked lentils (we used red, buy any kind is fine)
5 medium potatoes, sliced
2 medium onions, sliced
2 large portabella mushrooms (we pureed ours with the eggplant, but you could used them sliced also)
2 cloves garlic, crushed
1 400g can tomatoes (we chose crushed - if you use whole or diced, the finished product would be more structurally sound)
1 tsp. ground cinnamon
1 tsp. greek oregano
1 large eggplant, peeled and cubed
2 tbsp. olive oil
1 package vegan-rella
salt and pepper

White sauce!

1 1/4 c. rice or soy milk
2 tbsp. olive oil
2 tbsp. corn starch
1  tbsp. basil
1 tsp. fresh lemon juice
1 tsp. oregano
egg replacer
salt and pepper

Preheat oven to 400F.

Step 1: Put the lentils on to cook - 1/2 cup dry makes 1 cup cooked.  1 cup water with 1/2 cup dry lentils, bring to a boil, stir in a pinch of salt and some oil, then turn heat to low, cover and simmer for 30 minutes.

Step 2: While the lentils are on, prepare the eggplant.  Peel and slice into small chunks.  Baste with a bit of olive oil, then place in the oven on a non-stick pan and roast for about 30 minutes until soft.

Step 3: Next, the potatoes!  It's not necessary to peel, just give the skins a good scrubbing, then slice into thin rings - these will be used as top layer of the moussaka.  Cover the rings with water and boil for 10 minutes, then drain and set aside.

Step 4: Heat olive oil in a large pot or skillet.  Slice the onions, garlic and mushrooms (leave the mushrooms out if you're going to puree them) and cook on medium heat for 5 minutes, then add the lentils, tomatoes, cinnamon, oregano, salt and pepper to taste, stir well and remove from heat.

Step 5 (optional): Remove the eggplant from the oven, and using a food processor, puree the eggplant with the mushrooms and a little bit of olive oil.

Step 6: Start assembling the moussaka!  We used a 9x13 baking dish, but if you leave all of the veggies intact, you could probably used a 9x9 dish.  First add the lentil/tomato mixture and spread evenly.  Then add the mushrooms and eggplant and top off with the potato slices.  If you pureed the mushrooms/eggplant, it's easier to add the potatoes first, then spread the puree over top of them.

Step 7: Grate the vegan-rella and spread evenly over the top.

Step 8: Make the sauce!  Slowly bring the rice/soy milk to a boil and stir in the spices, lemon juice, salt and pepper.  Mix the olive oil and corn starch together to make a paste with no lumps, then whisk in to the sauce.  Finally, add the egg replacer - 1 egg's worth, according to package directions.  Then take off of the heat and stir until everything begins to thicken up.  Pour the sauce over top of the rest of the moussaka and then chuck it in the oven.

Step 9: Bake at 400F for 45 minutes.  Cover for the first 30, then remove the cover for the last 15 minutes of baking.  Let it cool for 10 minutes, then serve with fresh pita and hummus!

Step 10:  OM NOM NOM NOM!!!


Once you've finished that off, time for dessert!  We made ourselves a yummy "cheese"cake - no baking required.  We wussed out on the crust and used oreo crumbs and margarine, but if you're ambitious, here's a crust recipe that we've tried and loved from before:


Ingredients!

Crust
1 3/4 cups raw, unsalted nuts (almonds work well for this)
1/2 c. cocoa nibs
1/8 tsp. salt
3/4 tsp. cherry or vanilla extract
1 tbsp. cocoa
3/4 c. raisins

Filling
3 cups raw unsalted cashews
1/3 cup agave syrup
6 pitted dates
1/2 c. fresh lemon juice
1/4 c. water
2 tsp. vanilla extract
1 c. coconut oil
3/4 c. cocoa powder

Step 1: The crust!  If you're not lazy like us, grind the nuts, cocoa nibs (or just regular chocolate chips) and salt in a food processor until coarse.  Add vanilla extract and cocoa and pulse until thoroughly combined.  Add the raisins and pulse some more until blended and the mixture sticks together when you pinch it.  Press into the bottom of an 8-9 inch spring form pan, or just a regular tin pie plate, and put in the freezer while the filling gets made.

Step 2:  Soak the cashews in warm water for 1-2 hours and drain.

Step 3: Put the cashews, agave, dates, lemon juice and water in the food processor and blend until it's creamy.  Use a spatula to scrape down the sides to make sure you don't leave any chunks.

Step 4: Add the cherry/vanilla extract, coconut oil and cocoa powder, and continue processing until it's nice and smooth.  Pour the filling into the pan with the crust and put it back in the freezer for an hour to set.

Step 5: Remove from freezer and thaw until it's easy to slice - about half an hour.

Step 6:  Om nom nom nom...


Wednesday, July 14, 2010

Summer Heat!

Talk about inconsistency.  We're like the Oilers.  Hot streak for a few weeks, then nothin' doin' for 3 months.  That's pretty bad.  Well, here to make up for it, I have a recipe for the most delicious Southwest style Mexican soup.  This goes extremely well with cornbread, and all the other usual Mexi-fixin's - tortilla chips, guacamole and all the rest.  As with all soups, the longer you let it simmer before serving the better it'll taste, so give yourself a couple of hours at least before serving.

Ingredients!

6 c. veggie stock 
 1 c. crushed tomatoes
1 1/2 c. black beans*
1 c. frozen kernel corn
1 med. onion, chopped
2-3 stalks celery, chopped
1 each of fresh anaheim, chili and banana peppers, minced
1 med. green bell pepper, chopped
2-3 cloves garlic, crushed

6-8 dashes Tabasco sauce
1 tsp. salt
1/2 tsp. fresh ground pepper
1/4 tsp. cayenne pepper
1 dash liquid smoke
1 Tbsp. chili powder
1 Tbsp. basil
2 Tbsp. fresh lime juice 
1/4 c. + 2 Tbsp. olive oil
1/4 c. corn starch

Procedure!

Step 1. In a large pot, heat 2 Tbsp. olive oil until aromatic.  Add onion, hot peppers, bell pepper, celery and garlic, and saute over medium heat for 4-5 minutes.

Step 2. Add crushed tomatoes, lime juice and all the spices/seasonings.  Saute with veggies for another 5 minutes.

Step 3. Add the stock, beans and corn and bring everything to a boil, stirring constantly.  Reduce heat to low, cover, and leave to simmer for 1-2 hours.

Step 4. Whisk together 1/4 c. olive oil and 1/4 c. corn starch until there are no lumps.  Bring the soup back to a boil, stir in the mixture, then remove from heat and let stand for 10 minutes to thicken.

Step 5.  Garnish with cilantro, parsley or fresh dill.

Step 6.  Nom nom nom nom.

 This is one of the tastiest soups ever.  Adjust spices according to your own tastes.  The measurements given here yield a soup that is a bit spicier than your average medium salsa.

*Canned beans are fine, but as always, freshly prepared beans from dry are best.  To prepare black beans, soak 1 c. dry beans in 3 c. water overnight.  Drain, rinse, then cover the beans and bring to a boil.  Drain and rinse once more, then bring back to a boil in 3 c. salted water.  Reduce heat to min. and simmer for 1 hour, then drain and add to the soup.

Thursday, April 15, 2010

Unstirfry with Cauliflower Rice

A new friend lent me some cookbooks, so hopefully we will have many recipes to post in the next few weeks!

Until then, here is a recipe we tried out a little while ago. The recipe is raw (although we had to substitute a few non-raw ingredients.) I like the idea behind eating raw foods, and whole foods in general, although my love for warmth keeps me from going raw. Maybe if I lived in a warmer climate, like Hawaii, but for now, I'll stick with my cooked food, thank you!

This recipe is from "Vegan Fusion", with a few changes.

2 1/2 cups chopped red cabbage
1/2 cup thinly sliced carrots
1 red bell pepper, seeded and julienned
1/2 cup julienned snow peas
1 cup thinly sliced shitake mushrooms
1/4 cup thinly sliced onion
3/4 cup cashews

Dressing

1/2 cup sesame oil
3 TBS agave nectar or pure maple syrup
2 TBS umeboshi plum vinegar or raw apple cider vinegar
3 TBS Nama Shoyu **
1 small kaffir lime leaf, or zest of 1 lime
1 (1/2″-inch piece) peeled fresh ginger
1 garlic clove
1 TBS dehydrated onion flakes
1 tsp seeded and diced Thai chile or jalopeno
1 TBS tamarind paste

Cauliflower “Rice”
4 cups cauliflower florets
1/2 cup macadamia or pine nuts
1/2 tsp sea salt
1 TBS dehydrated onion flakes
1/2 tsp garlic powder

  1. Combine all of the vegetable medley ingredients in a large bowl and mix well. Place all of the dressing ingredients in a blender and blend until creamy. Add to the vegetable medley and toss well.
  2. Prepare the cauliflower rice by placing all of the ingredients in a food processor and pulse-chopping until a smooth but textured consistency is reached. Do not over-process or it will get too mushy.
  3. Serve the vegetable medley on a bed of cauliflower rice
** We didn't have Nama Shoyu, plus I can't have soy anyway, so we used BBQ sauce. This is our non-raw substitution.

This salad was delicious! I was a huge fan of the cauliflower rice... I think it would be a perfect thing to bring on a picnic, and eat lying in the sun. The recipe says that if you want softer veggies, you can leave them in the sun for about 30 - 45 minutes, stirring them occasionally.

I'd really like to try and lose some weight. I'm already down to my pre-pregnancy weight (and have been for a while), but I would like to try and get into better shape for the summer. I have some pretty bad eating habits, such as skipping breakfast, and eating big meals late at night. I don't really have much more to say on this subject, but I figure that now that it's out on the internet, it'll be harder for me to give up on it and slack off! Now all you readers can get on my back when you see me eating entire cakes. Only half the cake from now on! 

Monday, April 12, 2010

Roasted Squash Manicotti

I know, I know, it's been forever since I've updated this blog. This is how it always happens - we get off to a good start, and then life just takes over!

We've been so busy that we haven't been doing a lot of cooking lately. It's been mostly quick things, like stirfrys or burritos that really don't have a recipe. It's hard to find the time - or the enthusiasm - to make a real meal! But we had some family over a few weeks ago, and this is what we made to feed the masses! (Okay, six people).

This recipe takes quite a while, but you can prepare the filling earlier in the day, or even the day before, and just stick it in the fridge until you need it. 


INGREDIENTS
- 2 lbs roasted winter squash (we used butternut and mystery squash..)
- olive oil
- salt
- 1 cup walnuts
- 1 head of elephant garlic
- 1 tbsp sage
- salt and pepper to taste
- 8 manicotti shells
- alfredo sauce* 
-1 package vegan cheese, grated

1. Preheat oven to 400. Toss squash and pumpkin in a bit of olive oil and salt. Roast in the oven on a cookie sheet lined with parchment paper for 20 to 30 minutes, turning every 10 minutes. Roast garlic head at the same time, for about 15 mins, until soft. Allow squash to cool. Roast walnuts on a cookie sheet for 6 mins, turning after 3 mins. Allow to cool. Reduce oven heat to 350 degrees.
2. Mash squash and the head of garlic with a fork. Pulse walnuts in a food processor until they resemble coarse bread crumbs. Mix into the squash mixture along with the sage and the grated "cheese". Season to taste with salt and pepper.
3. Cook manicotti shells for 4 minutes in boiling water. Drain, and stuff with squash filling. (We found it was easiest to just use our hands to stuff the manicotti.) Place in a large baking dish and cover with Alfredo sauce. Cover dish and bake for 45 minutes. Remove cover and bake for 10 minutes. 
I need to remember to photograph first, eat later.

* Here is the recipe we used for the alfredo sauce. It was just kind of improvised, you could try a lot of different recipes
-3 C. rice milk
-1/4 C. corn starch, mixed with 1/4 C. oil
- 1/4 tsp. salt
-1 Tbsp. dried basil
-pinch cumin, sage, thyme each

1. Bring  rice milk and spices to a boil, stir in oil and corn starch mix, and then reduce heat. Let simmer until ready to use, whisking often.  
So delicious! John's mom brought a butternut squash soup, so we had that as a side, as well as some roasted asparagus! It was a hit with everyone. 

                                                                Rowan loves the soup! And messes!

Saturday, March 20, 2010

Macaroni and Cheese!

We all like to eat healthy. But, sometimes, when you've been taking care of a sick baby all week, when you're sick yourself, when winter just won't get the hint and leave...you need something more than salad. You need CARBS! Lots of carbs! But still cruelty-free carbs.

Ingredients:
- 450 g. elbow pasta (whole-wheat or spelt)

- 1 C. nutritional yeast
- 4 Tbsp. flour
- 2 C. rice milk
- 1/4 tsp. salt
- 1/4 tsp. garlic powder
- 1/8 tsp. mustard powder
- pepper, to taste

- 1 C. bread crumbs
- 1/2 tsp. garlic powder

- 1/4 C. chopped onion
- 1 C. frozen peas

Step 1: Boil water, preheat oven to 350F.
Step 2: Start cooking pasta! But don't cook all the way. Cook maybe 80% of the way.
Step 3: Add middle section of ingredients (nutritional yeast to pepper) in a large saucepan and mix together. Bring to a boil, then simmer, stirring constantly for about 3-4 minutes.
Step 4: Add partially cooked pasta to oven-safe casserole dish. Add nutritional yeast "cheese". Mix in those peas! Top with bread crumbs, garlic powder, and onions.
Step 5: Bake in oven for approx 20 min.

You will probably want to serve this with a big serving of some delicious steamed vegetables, like cauliflower. Just to show that you haven't given up the whole health food thing COMPLETELY.

We didn't take any photos, because we were all too busy eating.

Sunday, March 14, 2010

John's Ridiculously Tasty Chili

While I'm not usually one to toot my own horn, I have to say that I have both made and eaten a few chilies in my day, and this one is most certainly one of the very best.  It takes a bit of work, but the finished product is well worth the time.  And it makes enough to feed several people for a couple of days.  The outcome is moderately spicy, so feel free to add or subtract to taste if you prefer it hotter or milder.  Without further ado, here's what I'd take to the cookoff:


The Chili!

Ingredients:

2 C. kidney beans*
1 large bell pepper, chopped
4 large potatoes, skin on, scrubbed and cubed
1 C. corn
1 medium zucchini, sliced
1 small-medium onion, chopped
500mL crushed tomatoes
2 stalks celery, sliced
1 can of flat dark beer (leave open in the fridge overnight)
1 C. lentils
4 C. veggie stock

  - Seasonings:

1 Tbsp basil
3 dashes tobasco
1 tsp. salt
1 Tbsp chili powder
1/2 tsp. cayenne pepper
1 dash liquid smoke
1 tsp. thyme
1/2 tsp. coriander seed
3 Tbsp olive oil

Directions

If you're preparing the beans from dry, see below.

1. In a large pot, heat the oil at medium heat, then saute the onion, celery, zucchini and pepper for 5 minutes.
2. Add the crushed tomatoes and all of the spices and seasonings.  Stir thoroughly.
3. Add the stock and beer to the pot and bring to a boil.  Add the lentils, beans, corn and potatoes, stir, and reduce heat slightly to a simmer.
3. Add all the remaining ingredients and cook uncovered, stirring occasionally, for at least 1 hour.

*It's okay to use canned beans, but it will turn out better if you cook them from dry.  One cup of dry beans makes two cups cooked.  The easiest way to do this is to soak the beans in a bowl of water overnight.  You can also do a quick soak by covering the dry beans with water and bringing them to a boil with some olive oil for 3 minutes.  Then drain, rinse with cold water, cover, bring to a boil again, then simmer for 1 hour before continuing with the recipe.

As with all soups and stews, the longer you let it sit, the better it'll turn out.  Gives all of the ingredients time to get to know each other.  I like to serve the traditional way with a green side salad, garlic toast and a nice red wine.  If you have a family chili recipe that you'd like to share, I'd love to try it.  Post it in the comments and we'll make yours!

Home-made "Sausage"!

My best friend is a celiac, which means she can't eat gluten. I made this recipe to spite her. And because I missed sandwiches. 

Ingredients
- 1 1/2 C. vital wheat gluten
- 1/4 C. nutritional yeast
- 1/2 tsp. salt
- 2 Tbsp. paprika
- 1/4 tsp. cinnamon
- 1/4 tsp. cumin
- 1-2 tsp. pepper
- 1/8 tsp. cayenne pepper
 - 3/4 C. cold water
- 2 1/2 Tbsp. crushed tomatoes
- 2 1/2 Tbsp. ketchup
- 2 T. olive oil (I used canola because I was out of olive oil)
- 2 Tbsp. vegetarian Worcestershire sauce (or soy sauce, or, if you can't eat soy like me, check out our Stroganesque recipe for a vegan soy free version!)
-1-3 cloves garlic, crushed well

Now go like this! 


1. Preheat oven to 325°.
2.In a large mixing bowl mix dry ingredients. Mix the rest of the ingredients (liquid ingredients) in a smaller mixing bowl. Whisk well until mixed.
3. Add the liquid ingredients to the dry ingredients. Mix well, then knead for several minutes. (I'm lazy, so I only kneaded it for 3 minutes. The longer you knead it, the better the texture)
4. Form into a log (6-8" long), wrap tightly in foil, twisting ends.

 Looks like Christmas!
Bake for 90 minutes. When done baking, unwrap and leave out to cool all the way. Then wrap it foil or plastic and refrigerate. Slice to use as desired.

I didn't take any finished photos, but here is a picture of the pig you DIDN'T eat!

We probably made about 10-12 sandwiches with the finished product, so it's much cheaper than the store bought veggie slices! And I liked it just as much. You could also use it in jambalaya or any recipe calling for sausage. Nom nom nom.

Friday, March 12, 2010

Bed Sharing

My three favourite things are
  • John
  • Rowan
  • Sleep
So it makes perfect sense that I would want them all in the same place. Rowan has a crib, but he's never slept in it. John sleeps on the futon sometimes, but then I forgive him. And there's nothing more wonderful than waking up next to my two loves.


On second thought, maybe there is... 

All to myself! Yes! Finally!

Wednesday, March 10, 2010

Banana Coconut Creme Pie

I've never really been a big "pie" fan. Generally, I don't like cooked fruit. But then someone told me about creme pies, and my life was changed!

John and I made this pie last night to celebrate Rowan's 6 month birthday. He didn't get to eat any, but it was the thought that counts.

Ingredients:

- 19 oz coconut milk
- 1/4 C. maple syrup
- 1/4 C. cornstarch
- 1/2 C. granulated sugar
- 1 tsp. yellow food colouring (optional)
- 1 tsp. vanilla extract
- 1 Tbsp. Ener-G egg replacer mixed with 1/4 C. rice milk
- 3 to 4 ripe bananas, thinly sliced

1. Set aside 1/4 C. of coconut milk (about 2 oz). Combine the remaining coconut milk and maple syrup in a heavy saucepan over medium heat. Heat, stirring, until it begins to bubble. Remove from heat.
2. In a new bowl, whisk together the reserved coconut milk, cornstarch, sugar, food colouring, and vanilla.
3. Add egg replacer to the coconut milk/maple syrup, then add the cornstarch mixture. Heat over medium heat, stirring continuously, until it comes to a simmer. Cook, stirring continuously, for about 4 minutes or until thickened.
4. Spread a small amount of the custard in the bottom of the pie shell. Place a layer of sliced banana on top of the custard. Repeat! Repeat again! Let cool to room temperature, and then refrigerate until ready to nom.
5. Nom nom nom.

You can do whatever you want for a pie crust. Store-bought, or home made, doesn't really matter. You're going to want to cook it, though, and let it cool completely before putting in the custard.

John and I tried out a random recipe I found online, and it FAILED. John's theory is that a bitter chef posted it online to screw with all the amateurs.

 
"Let's see them make delicious pie NOW! A-ha-ha-ha!"

And he's probably right. So don't trust random recipes posted on the internet! If you want to make your own pie crust, use THIS recipe! 

Ingredients:
- 1 1/4 C. flour
- 1/4 tsp. salt
- 1/2 C. coconut butter
- 3 Tbsp. very cold water

1. In a large bowl, stir together the flour and salt. Cut the shortening in the flour mixture until very well mixed, then add the water. 
2. Mix together until a dough forms.
3. On a lightly floured surface, knead for a minute or two and then roll into a ball. 
4. Wrap dough in wax paper, and chill for 30 minutes. Roll the dough into a pie crust. (about 9")
5. Bake in oven at 450°F for about 15 minutes! 

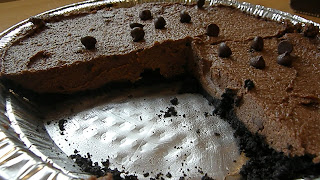
Here's our pie with two generous slices taken out!

Tuesday, March 9, 2010

Bean Stroganesque


This delightful recipe was based off of a stroganoff, but since we changed a lot of the ingredients, it became something that was not quite a stroganoff, hence stroganesque.  This is definitely one of our favourite culinary creations to date!

Bean Stroganesque

Ingredients: 
1 tsp canola oil 
1 onion, chopped
8-10 medium sized mushrooms, quartered
2 tsp. paprika
1/2 tsp. ground thyme
1 C. vegetable stock
2 Tbsp dry red wine
2 tsp Worcestershire sauce*
2 C. cooked red kidney beans
1/2 cup rice milk
1 Tbsp. lemon juice
1 tsp white wine vinegar
2 tsp cornstarch
fresh ground black pepper
2 C. cooked noodles
2 green onions, thinly sliced

Step 1: In a large nonstick pan, heat the oil over medium heat; cook the onion for about 4 minutes, until translucent.  Add the mushrooms and cook for another 4 minutes until they are soft.  Meanwhile, add the lemon juice and vinegar to the rice milk, stir and set aside.
Step 2: Sprinkle in the thyme and paprika and cook for another minute
Step 3: Stir in the stock, wine and Worcestershire sauce.  Crush about a third of the beans with a fork, then add to the pan along with the other beans and bring everything to a boil.  Reduce the heat and simmer uncovered for 10 minutes, until the liquid is slightly reduced.
Step 4: Mix the milk with the cornstarch until smooth, and stir in to the bean mixture.  Cook, stirring continuously for another 2 or 3 minutes until the mixture thickens.  Season to taste with fresh ground pepper.
Step 5: Spoon over noodles and garnish with the green onions.
Step 6: Om nom nom nom nom!

*Since we couldn't find any vegan and soy-free Worcestershire sauce, we made our own.  It went like this:

2 tsp. apple cider vinegar
pinch of salt & pepper
1/8 tsp. sage
1/4 tsp. blackstrap molasses
dash of liquid smoke

Combine everything in a small bowl and mix thoroughly!  It was quite yummy, the liquid smoke gave it that nice, savoury flavour, and it smelled wonderful when it went in the pot.


You may also recall - see the previous post if you don't - that we made a sort of mayonnaise to go with our fake tuna salad.  There was quite a bit left over, so we turned it into an herb and garlic alioli and had it over fried potatoes.  Here's the recipe:

4 large potatoes, skin on, scrubbed and cubed
1 C. "mayonnaise"
4 cloves garlic
1/2 tsp. basil
1/2 tsp. thyme
1/2 tsp. sage
salt and pepper
1 Tbsp. olive oil

Step 1:  In a small pot, cover the potatoes with water and bring to a boil.  Cook for 4-5 minutes until they're just a bit tender, but not fully cooked.  Drain and set aside.
Step 2:  Put the mayo, garlic, basil, thyme, sage, salt and pepper into the blender and blend on high until smooth.
Step 3:  Heat the oil in a non-stick pan on medium-high, add the potatoes and cook for another 10 minutes, flipping the potatoes regularly until they're golden brown and crispy on the outside.
Step 4:  Pour the alioli over the potatoes while they're still in the pan, then remove from heat.
Step 5:  Nom nom nom.

Aside from being a good day in the kitchen, today was also Rowan's 6 month birthday!  He celebrated it by cutting his second tooth.  An exciting event, to be sure, but one that he didn't find especially pleasant.  In spite of the pain in his gums, he still managed to spend most of the day being smiley and happy.  Next item on the agenda: learn how to crawl!

Sunday, March 7, 2010

Here are two things you should know about me!
  1. I plan on being a vegan for the rest of my life.
  2. I love tuna.
When I was pregnant, I really craved tuna salad sandwiches, but I wasn't ready to give up my ethics for a night of tuna-ey goodness. So I made a vegan tuna salad, which turned out really well! I used vegannaise, which is a vegan soy (or grapeseed oil) based mayonnaise substitute. Lately I've been craving it again... But I can't have soy because of Rowan! So it was up to me to make my own "mayonnaise", and then make a vegan tuna salad. So it's not really a tuna salad at all. It's like... a bean salad.

Vegan Soy-Free "Mayonnaise"

Ingredients:
-1 3/4 cups drained cooked or canned white beans (one 15 or 16 oz cans) - I used navy beans!
-2 Tablespoons fresh lemon juice
-1 Tablespoon white wine vinegar or additional fresh lemon juice
-1/2 teaspoon salt
-1/4 teaspoon dry mustard
-1/3 cup extra-virgin olive oil
-1/3 cup organic canola or safflower oil

1. Place the beans, lemon juice, vinegar, salt, and dry mustard in a blender. Blend until very creamy. 
2. With the appliance running, drizzle in the oils in a slow, steady stream through the cap opening in the lid.  Continue processing until well blended and completely smooth, stopping to scrape down the sides of the container as needed. 
3. Chill thoroughly before using.  Keeps about 7 days in the refrigerator

So you can use this as a substitute for anything you would use mayonnaise for. It's kind of like a mild hummus, I suppose. It doesn't really taste like mayonnaise, but it does the trick!

"Tuna" Salad

-1(15 oz.) can chick-peas, drained (or 1.5 c. cooked)
-1/2 C. vegan mayonnaise (I would start with about 1/4 C, and add more until it's at a texture you like)
-1/3 C. minced celery
- 1/4 C. radish
-2.5 T. minced dill pickle
-1/2 T. nutritional yeast
-1 green onion, chopped
-1/2 t. kelp powder (optional, if you like seaweedy taste. I don't.)
- pepper, to taste

1.In a medium bowl, mash the chick-peas coarsely with a fork.
2. Mix in the remaining ingredients. Use on sandwiches or on a bed of salad greens.

Everyone makes tuna salad differently, so this is just what I did. You can add more or less vegetables, relish, anything you want to make it delicious!

Thursday, March 4, 2010

You don't win friends with salad!

... You win them with delicious cupcakes!

John and I haven't been doing too much cooking/baking lately. Everything we've made has been along the lines of "what do we have in the fridge?". A lot of stirfrys, and perogies.

But the other night I was feeling antsy, and had a bit of a sweet tooth, so I made some cupcakes!

This recipe is from Vegan Cupcakes Take Over the World, which is the greatest cookbook (bakebook?) to ever exist. Even if you only make cupcakes once a year, you should buy this book.

I did edit it a bit though, so I will put my edited version on here. If you want the real version, buy the book!

Banana Cupcakes

1/2 C. very ripe banana, mashed well (you don't want any lumps. I mashed mine with an immersion blender)
1 1/4 C. all purpose flour
1/4 tsp. baking soda
1 tsp. baking powder
3/4 C. granulated sugar
1/3 C. canola oil
2/3 C. rice milk
1 1/2 tsp. vanilla extract
1/2 tsp. almond extract

1. Preheat oven to 350°F.
2. Sift the flour, baking soda, baking powder, and sugar in a large bowl. In a seperate, smaller bowl, whisk together the oil, rice milk, vanilla, almond extract, and banana. Create a well in the dry ingredients and fold in wet ingredients, mixing to just combine.
3. Fill cupcake liners two-thirds full. Bake for 20-22 minutes.
4. Cool completely before icing.

I haven't quite figured out how to make a vegan AND soy-free buttercream-style frosting. I didn't want boring cupcakes though, so I made a chocolate glaze... I put 1/4 C soy milk in a little sauce pan over the stove, until it was gently boiling. Then I took it off the heat, added 2 Tbsp. maple syrup, and chocolate chips. I didn't really measure the chocolate chips, I just poured them while slowly stirring with a spatula until it was nice and thick. I probably used about 150 g. Then I poured in about 1/2 oz. of coconut rum! 

You can make the glaze while the cupcakes are baking, then set it aside, because you want it to be cooled down when you use it.

When the cupcakes are ready, spoon the glaze generously over top. I topped my cupcakes with a slice of frozen banana! (Fresh works too.)


These were really good. I made them at about 10 pm... They didn't make it through the night.

Wednesday, February 24, 2010

If babies aren't your thing...

Here's for those of you who didn't find my baby stew that appetizing!


Tuesday, February 23, 2010

Cajun Night!


Chickpea Jambalaya
Ingredients:
- 1/4 cup vegetable oil
- 2 large yellow onions, chopped
- 1 green pepper, chopped
- 2 celery stalks, chopped
- 2 tsp salt
- 1/2 tsp cayenne pepper
- 1 tsp chili powder
- 1 can chickpeas, rinsed
- 2 bay leaves
- 1 1/2 tsp dried thyme
- 3 cups uncooked white rice
- 6 cups water
- 4 green onions, sliced
1. Heat oil on medium heat in a stockpot. Add in onions, bell peppers, celery, salt, and cayenne. Cook for 20 minutes, stirring often, until veggies are a deep golden brown.
2. Add in chickpeas, bay leaves, thyme, parsley, and rice. Stir until rice is coated.
3. Add in water, cover, and cook on medium-low heat, covered, for about 30 mins until rice is soft and liquid is absorbed.
4. Remove bay leaves and stir in green onions. Serve.
5. Nom nom nom! 

Cajun Carrots
Ingredients: 
- 6 large carrots, thickly sliced
- 1 Tbsp. olive oil
- 1 Tbsp. maple syrup
- 1/2 tsp. dried thyme
- 1/2 tsp paprika
- pinch of cayenne
- 1/4 C. chopped pecans

1. Steam or boil carrots until soft.
2. Add to remaining ingredients, mix together!
3. Nom nom nom! 

Cornbread
Ingredients: 
- 2 cups cornmeal
- 1 cup unbleached all-purpose flour
- 2 teaspoon baking powder
- 1/3 cup canola oil
- 2 tablespoons maple syrup
- 2 cups soymilk
- 2 teaspoons apple cider vinegar
- 1/2 teaspoon salt
1. Preheat oven to 350° F, line a 9x13 baking pan with parchment paper or spray the bottom lightly with non-stick cooking spray. (I didn't, because I can't use cooking spray...and my cornbread stuck to the bottom of the pan.)
2. In a medium bowl, wisk together the soymilk and the vinegar and set aside.
3.In a large bowl, sift together the dry ingredients (cornmeal, flour, baking powder and salt).
Add the oil and maple syrup to the soymilk mixture. Wisk with a wire wisk or a fork until it is foamy and bubbly, about 2 minutes.
4. Pour the wet ingredient into the dry and mix together using a large wooden spoon or a firm spatula. Pour batter into the prepared baking pan and bake 30-35 minutes, until a toothpick inserted into the center comes out clean. Slice into squares and serve warm or store in an airtight container. 
5. Nom nom nom! 

These recipes are from http://vegandad.blogspot.com ! Wonderful inspiration. I edited them a bit, because I like spicy, and I can't have soy! 

I think the jambalaya turned out pretty good. If I were to make it again, I would probably add more vegetables to give it more... substance. Or try making some fake sausage... The recipe also made a HUGE amount of food. Enough for dinner, and two lunches after! 

 In other news, Rowan cut his first tooth today!  He doesn't really want to show it off quite yet, but it's there and it's sharp!


Monday, February 22, 2010

Vegan Babies

 
I think I need a bigger pot. 


Step 1: Get pregnant. Keep in the bun in the oven for approx. 40 weeks.
Step 2: (And this is the tricky part!) Give birth.
Step 3: Fatten up your baby, until he/she reaches around 20 lbs. (Depending on how many mouths you have to feed!)
Step 4: Place baby in large pot with assorted veggies and spices. Don't be afraid to experiment!
Step 5: Nom nom nom.


No babies were harmed in the makings of this post.

Sunday, February 21, 2010

Roasted Red Pepper Sauce


Ingredients:

-1 red pepper
-1 orange pepper
-2 Tbsp olive oil
- 1 onion
- 4 cloves garlic, minced
- 1 Tbsp basil
- 1 C. raw cashews
- 1 1/2 C. water
- 1/2 C veggie broth
- salt and pepper

Step 1: Preheat oven to 450° F. Cut peppers in half, core and seed them. Bake them for about 15-20 minutes.
Step 2: Meanwhile! Heat oil in a saucepan over medium heat. Saute onion and garlic until soft and translucent. (About 10 minutes)
(Also, you should probably start cooking your pasta around this time. We used rotini.)
Step 3: Meanwhile! Blend cashews and water in blender until smooth. Once your peppers are roasted (and chopped), and your onion/garlic is ready, add to blender. Add basil, broth, and blend until smooth.
Step 4: Heat in a saucepan and season to taste!
Step 5: Nom nom nom.

This sauce would also make a great alternative to regular tomato sauce on a pizza, or as a spread for grilled sandwiches!

On an unrelated note, we took Rowan to the Muttart Conservatory the other day. He was generally unenthused, but he woke up right before we left, so we got a few cute photos of him. This particular face is the precursor to the single eyebrow raise.